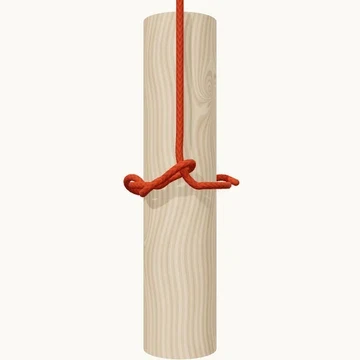
The standing part lies in front of the vertical log.
Camping · 9 steps
A wrap around a log with the tail twisted back around its own rope.
A timber hitch starts with one turn around a log. The end then goes around the standing part and winds backward around its own encircling leg. Those reverse turns grip the rope as tension draws the hitch against the timber.
The turns are around the rope, not extra turns around the whole log. Rotate the model to inspect the portions hidden behind the timber. For a long object, an additional half hitch farther along it can help control its direction while dragging.
When to use it
Attach a rope to timber for dragging.
Keep in mind
Needs steady tension. A separate half hitch helps guide a long log.
Check your knot
The end goes around the standing part before the reverse turns.
Each reverse turn wraps the same encircling leg.
The hitch is kept under the intended steady tension.
How to tie Timber Hitch
Start above the log
The standing part lies in front of the vertical log.
Lower the end
Bring the working end down the front of the log.
Go around the log
Take the end to the right, behind the log, and back to the front on the left.
Go around the standing part
Pass behind the standing part, around its right side, and back down to the left.
Make the first twist
Bring the end down in front of the rope, then up through the gap between the rope and log.
Make the second twist
Continue around the same rope in the same direction. Rotate the view to see behind the log.
Make the third twist
Add a third twist around the same encircling section of rope.
Leave the tail
Leave a short tail after the third twist, behind the right side of the log.
Check the hitch
One wrap surrounds the log. Three reverse twists wind around the rope itself.