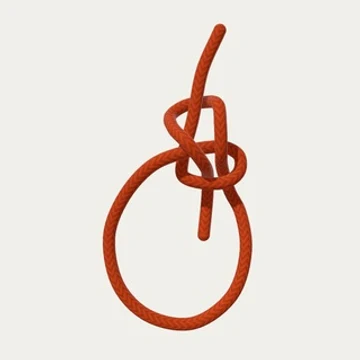
Bowline
Make a fixed loop at the end of a rope.
WHEN TO USE IT
- Tie a loop around a post or through a ring.
KEEP IN MIND
Can loosen when unloaded or repeatedly shaken.
Step-by-step
- Start with the standing part
Leave enough working rope below to form the large loop.
- Bring the end down
Extend the working end below the standing part.
- Make the small loop
Turn the end to the right, around the small loop, and across the front of the standing part.
- Form the large loop
Bring the end down the left side, across the bottom, and back up on the right.
- Come up through the opening
Pass behind the lower rim and through the small loop. Bring the end forward above its upper rim.
- Go around the standing part
Take the end around the standing part from the right, behind it, and back on the left.
- Return through the same loop
Bring the end forward across the upper side and down through the small opening, behind its lower rim.
- Leave the tail inside
Bring out the short tail inside the large loop, beside its returning leg.
- Check the bowline
The collar surrounds the standing part. Both passes share the small loop, and the tail stays inside the large loop.