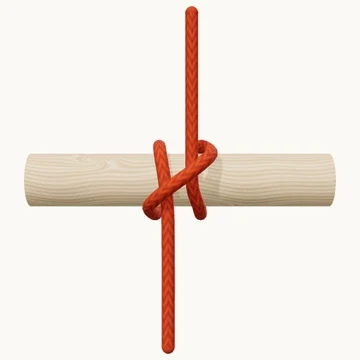
Two turns and a crossing attach a rope to a post or rail.
A clove hitch has two turns around a support and a diagonal crossing over the front. The second turn repeats the direction of the first, and the end finishes underneath that diagonal. Turning the model helps reveal the two separate turns at the back.
It is a convenient starting or finishing hitch for lashings and temporary ropework. Its behavior depends on the support and pull, so it should not be treated as a permanent attachment simply because it is quick to tie.
When to use it
Start a lashing; make a temporary attachment.
Keep in mind
Can slip or jam. Check temporary attachments as tension changes.
Check your knot
- Both turns go around the support in the same direction.
- The diagonal crosses over the two front parts.
- The working end finishes underneath the diagonal.