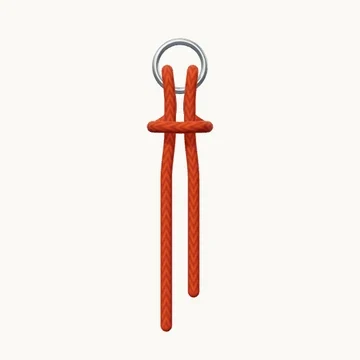
Attach a line to a ring or rail with two opposing turns and a collar across the front.
Also known as Lark’s head, Girth hitch.
The cow hitch has two turns around its support, with a connecting collar across the two hanging parts. Unlike a clove hitch, the turns run in opposite directions. The lesson follows a free end through a ring so each turn can be seen separately.
It is handy for light attachments and for understanding the path of a girth hitch. A folded sling can make the same basic arrangement by passing one end through the other. The way the hitch is loaded still matters: pulling one free end is different from pulling both legs of a closed sling.
When to use it
- Attach light cord to a ring or handle.
- Learn the arrangement used by a girth hitch in a sling.
Keep in mind
An open cow hitch can slip when only one end is loaded. Choose an attachment suited to the direction of pull; do not treat it as a locked termination.
Check your knot
- The two turns oppose one another.
- The collar traps both descending parts.
- The attachment is dressed snugly against its support.