Take the working end upward toward the support ring.
Camping · 8 steps
An adjustable loop that grips when the standing line is tensioned.
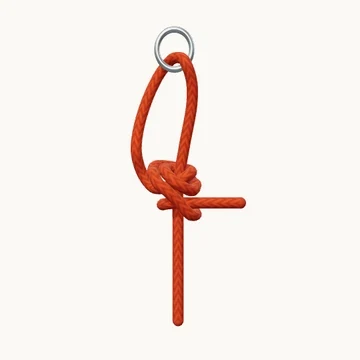
The midshipman’s hitch forms a loop that can be adjusted along its own standing part. Its first two turns are made inside the large loop, with the second tucked into the first to create a jamming arrangement. A half hitch outside the loop completes it.
That tucked second turn is the distinction to watch when comparing it with a taut-line hitch. Release tension before moving the hitch, then restore the load and check that the turns grip the actual cord you are using.
When to use it
Adjust a tent guyline or clothesline.
Keep in mind
Grip depends on the rope. Its tucked second turn distinguishes it from a taut-line hitch.
Check your knot
The second inner turn tucks into the first.
The final half hitch sits outside the large loop.
The hitch grips under the intended pull and slides when released.
How to tie Midshipman’s Hitch
Start at the ring
Take the working end upward toward the support ring.
Thread the ring
Pass the end through the ring and bring it back to the left.
Leave an adjustable loop
Bring the end down beside the standing part, leaving a long loop.
Make the first turn
Wrap the end around the standing part inside the large loop.
Tuck the second turn
Wrap again inside the loop, crossing the first turn and tucking snugly beside it.
Cross to the outside
Bring the end diagonally over the turns and down, outside the large loop.
Add a half hitch
Wrap in the same direction below the first turns. Tuck under the diagonal and bring the end out to the right.
Check the hitch
The inner turns grip the standing part. Release tension before sliding the hitch to adjust the loop.