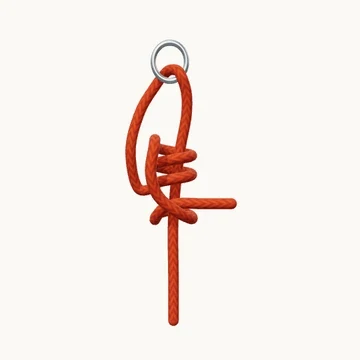
Taut-Line Hitch

Taut-Line Hitch
Preparing the rope…

Start with a long end

1/8

Leave enough working rope for an adjustable loop and three turns.

Camping · 8 steps

Tie an adjustable guyline with two inside turns and one outside half hitch.

Also known as Tent-line hitch.

The taut-line hitch lets you change the length of a loop without untying the attachment. With the load released, move the hitch along the standing rope; tension makes the turns grip again. It is a useful starting point for adjustable tent and tarp lines.

This version has two parallel turns inside the large loop, followed by a half hitch outside it. The second inner turn does not tuck beneath the first. That detail separates it from the midshipman’s hitch, which looks similar but has a different jamming turn.

When to use it

  • Adjust a tent or tarp guyline.
  • Tension a light clothesline that needs occasional adjustment.

Keep in mind

Some slick or stiff ropes do not grip well. Wrap count alone does not make every cord suitable; test the actual line and recheck it as conditions change.

Check your knot

  • Both inner turns run in the same direction.
  • The final half hitch sits outside the large loop.
  • Release the load before sliding, then test the grip.
How to tie Taut-Line Hitch
  1. Start with a long end

    Leave enough working rope for an adjustable loop and three turns.

  2. Go through the attachment

    Pass through the ring and turn back beside the standing part.

  3. Leave an adjustable loop

    Bring the end down on the left, leaving room between the ring and the hitch.

  4. Make the first inside turn

    Wrap the end around the standing part, inside the large loop.

  5. Add a parallel turn

    Wrap a second time toward the ring. Lay this turn beside the first without crossing it.

  6. Cross outside the loop

    Bring the end diagonally down over the two turns to the other side of the knot.

  7. Finish with a half hitch

    Go around once more in the same direction, then tuck below the diagonal and bring the tail out.

  8. Check the adjustable hitch

    Two parallel turns lie inside the loop and a half hitch lies outside. Slide it only after releasing tension.

Explore the 3D steps
References & further reading