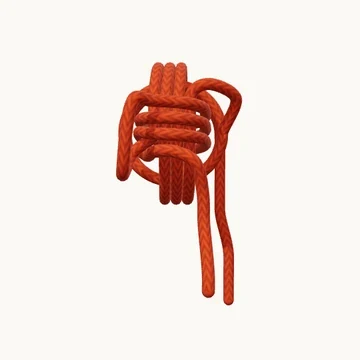
Monkey’s Fist

Monkey’s Fist
Preparing the rope…

Leave a tail

1/9

Allow enough rope for three sets of three turns. This view leaves the center empty.

Boating · 9 steps

Weave three groups of turns at right angles to form a rounded rope end.

A monkey’s fist has three interwoven groups, with each group crossing the other two. First make three turns, wrap a second group across them, then lead the third group inside the first and outside the second. The empty spaces in this lesson expose that route.

The finished shape develops gradually. Follow the rope from one end and transfer a little slack through each turn, repeating the process until the groups sit together. Pulling one end hard while leaving loose turns inside usually makes the outside uneven.

When to use it

  • Make a decorative cord end.
  • Practice three-direction weaving and gradual dressing.

Keep in mind

The model has an empty center and does not show a weighted core. It is a weaving lesson, not a specification for throwing or load-bearing equipment.

Check your knot

  • Each of the three groups has three turns.
  • The third group goes inside the first and outside the second.
  • Slack has been worked through the full route.
How to tie Monkey’s Fist
  1. Leave a tail

    Allow enough rope for three sets of three turns. This view leaves the center empty.

  2. Start the first set

    Wrap the first turn around the open center.

  3. Make three parallel turns

    Lay the first three turns side by side.

  4. Turn across the first set

    Start a second set at right angles, going around the outside of the first.

  5. Complete the second set

    Make three turns across the first band.

  6. Weave the third set

    Pass inside the first turns and outside the second turns.

  7. Complete three final turns

    Follow the same inside-and-outside route three times.

  8. Leave the finishing end

    Bring the tail clear of the third group and leave enough rope for gradual dressing.

  9. Work out the slack

    Follow the rope through all nine turns, taking up slack gradually. Keep the three groups aligned around the empty center.

Explore the 3D steps
References & further reading