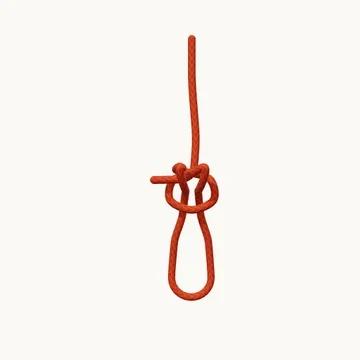
Perfection Loop

Perfection Loop
Preparing the rope…

Start with the line

1/9

Leave enough tag to make two loops.

Fishing · 9 steps

Make a small fixed loop with two overlapping loops and a final bight pulled through the first.

Also known as Angler’s loop.

The perfection loop places a fixed eye close to the line’s axis. Make the first loop, form a second in front of it, and lay the tag between the two. Pulling the second loop through the first traps the tag and leaves the second loop as the finished eye.

The important movement is a closed fold passing through an opening, not a loose end taking a shortcut around it. Keep that first opening visible while learning. The tag ends up projecting beside the knot, which helps distinguish this loop from a doubled overhand.

When to use it

  • Make a compact loop at the end of a leader.
  • Prepare a loop-to-loop fishing connection.

Keep in mind

Set the knot carefully in the intended line and inspect the short tag before trimming. Do not mistake it for a sliding loop.

Check your knot

  • The tag lies between the two loops before the pull-through.
  • The second loop passes through the first.
  • The standing line and finished eye align without an extra twist.
How to tie Perfection Loop
  1. Start with the line

    Leave enough tag to make two loops.

  2. Make the first loop

    Turn the end behind the standing line to form the first opening.

  3. Make the second loop

    Form a second loop in front of the first. This larger loop will become the finished eye.

  4. Lay the tag between

    Put the tag across the gap between the two loops.

  5. Bring the second loop forward

    Keep the second loop open and prepare to pass its closed fold through the first.

  6. Line up the fold

    Bring the folded loop in front of the first opening.

  7. Pass through the first loop

    Push the entire closed fold through the first loop, keeping the tag between the two.

  8. Draw out the fixed loop

    Pull the loop away from the standing line. The tag remains across the base. Dress the knot before use.

  9. Snug the base of the eye

    Draw the first loop around the second. The tag stays trapped across the base and the fixed eye remains open.

Explore the 3D steps
References & further reading