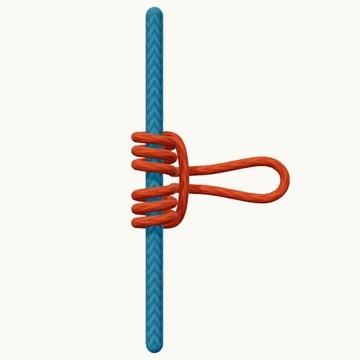
Start with a prepared closed cord loop behind the larger rope.
Loops & Ropework · 8 steps
Wrap a cord loop around a rope to make a sliding friction hitch.
Also known as Prusik hitch.
A Prusik uses a closed cord loop to make a friction hitch around a host rope. Repeated passes of the loop build matching groups of turns on either side of the central bridge. Those turns grip when the loop is loaded and can be moved when tension is released.
The cord must remain one continuous loop during each pass. Keep its joining knot away from the working coils in a real setup. Compare the Klemheist to see another closed-loop hitch with a different wrap and pull-through arrangement.
When to use it
Practice a hitch that slides when released and grips under tension.
Keep in mind
Grip depends on cord, rope, diameter, and wrap count; release tension before sliding.
Check your knot
The cord remains a closed loop through every pass.
The turns lie neatly on both sides of the central bridge.
The actual cord and host rope grip together under the intended pull.
How to tie Prusik
Place the loop behind the rope
Start with a prepared closed cord loop behind the larger rope.
Bring the fold around the front
Carry the left fold forward around the host, toward the opposite loop.
Continue around the back
Carry the same fold through the opposite loop and around the back to the left.
Add the second pair
Bring the fold forward again, placing the new turns inside the first pair.
Carry the fold around again
Continue behind the host. Keep the turns beside one another.
Add the third pair
Bring the fold forward inside the earlier turns, making three upper and three lower wraps.
Pass through the original loop
Take the closed fold through the original right-side loop toward the back.
Draw the loop out to the right
Draw the outgoing loop rightward as the original outer loop closes across the wraps.