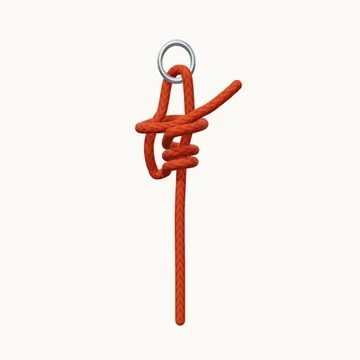
Adjustable Grip Hitch

Adjustable Grip Hitch
Preparing the rope…

Start with a long end

1/8

Leave enough working rope for an adjustable loop and three turns.

Camping · 8 steps

Tie an adjustable loop with two inner turns and a final hitch around both legs.

The adjustable grip hitch begins with two turns around the standing rope inside a large loop. Its final hitch then surrounds both the standing part and the returning loop leg. That wider final turn separates this route from a normal taut-line hitch.

Keep the first two turns together while forming the final crossing. With the line unloaded, the hitch can be moved to change the loop size. Leave room between the hitch and the attachment rather than forcing the finish hard against a large object.

When to use it

  • Adjust light tent or tarp lines.
  • Compare adjustable hitches with different final turns.

Keep in mind

Test the actual cord and attachment. This is not a climbing hitch, and sudden changes of load or an unsuitable position against the support can cause release.

Check your knot

  • The first two turns surround one rope part.
  • The last hitch surrounds both loop legs.
  • The tail passes under the final crossing.
How to tie Adjustable Grip Hitch
  1. Start with a long end

    Leave enough working rope for an adjustable loop and three turns.

  2. Go through the attachment

    Pass through the ring and turn back beside the standing part.

  3. Leave an adjustable loop

    Bring the end down on the left, leaving room between the ring and the hitch.

  4. Make the first inside turn

    Wrap the end around the standing part, inside the large loop.

  5. Add a parallel turn

    Wrap a second time toward the ring. Lay this turn beside the first without crossing it.

  6. Go around both loop legs

    Wrap around the standing part and the returning leg together.

  7. Tuck beneath the last turn

    Pass under the final crossing and bring the tail out.

  8. Dress the adjustable hitch

    Keep the first two turns around one part and the final hitch around both. Slide only with the line unloaded.

Explore the 3D steps
References & further reading