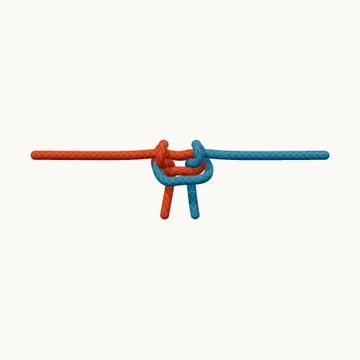
Join two ends with the interlocking body of an alpine butterfly.
Also known as Butterfly bend.
The alpine butterfly bend uses two separate ends to make the central structure familiar from the butterfly loop. Instead of retaining the loop, the two ends form tails. The standing parts extend away from opposite sides of the dressed body.
Follow each color through its own turn and the shared central opening. The interlock matters more than a symmetrical outline: two similar-looking loops laid beside one another do not form the bend until their returns cross and pass through correctly.
When to use it
- Join two ropes with a compact interlocking bend.
- Compare an end-to-end bend with an alpine butterfly loop.
Keep in mind
Use compatible rope and adequate tails. Performance depends on the actual material, dressing and loading; a neat shape alone is not a load test.
Check your knot
- The standing parts leave opposite sides.
- Each tail returns through the central interlock.
- The two halves are dressed together without trapped twists.