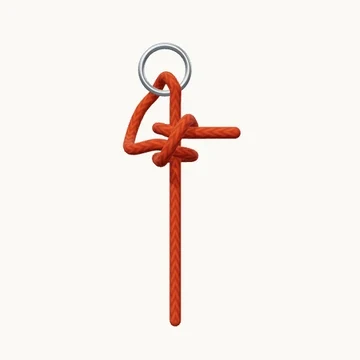
Buntline Hitch

Buntline Hitch
Preparing the rope…

Start below the ring

1/8

Leave a working end long enough to go around the attachment and make two hitches.

Boating · 8 steps

Secure a line to a ring with a compact pair of hitches tied inward toward the attachment.

The buntline hitch begins with a pass through the attachment, then forms a clove-hitch structure around the standing rope. Its second half hitch sits nearer the attachment than the first. This inward finish is the small but important difference from ordinary two half hitches.

As the standing part is pulled, the finish draws toward the ring. It makes a compact attachment, though one that can be reluctant to come apart after sustained tension. Follow the end all the way around the standing rope before making the final tuck.

When to use it

  • Attach a small line to a ring or fitting.
  • Make a compact termination where easy release is not the main priority.

Keep in mind

It can jam under load. Use another attachment when frequent untying is important, and leave a tail appropriate to the rope.

Check your knot

  • Both hitches surround the standing part.
  • The second hitch is closer to the ring.
  • The final end passes under its crossing strand.
How to tie Buntline Hitch
  1. Start below the ring

    Leave a working end long enough to go around the attachment and make two hitches.

  2. Go through the ring

    Thread the working end through the ring and bring it back beside the standing part.

  3. Make the first hitch

    Take the tail around the standing part below the attachment loop.

  4. Cross over the first turn

    Bring the end diagonally upward, toward the ring, across the front.

  5. Wrap a second time

    Place the second turn closer to the ring than the first.

  6. Tuck beneath the crossing

    Pass the tail under the diagonal strand that crosses the front.

  7. Leave a tail

    Bring the tail out without pulling it all the way through.

  8. Check the finish

    The clove-hitch structure closes toward the ring. Pull the standing part to snug it against the attachment.

Explore the 3D steps
References & further reading