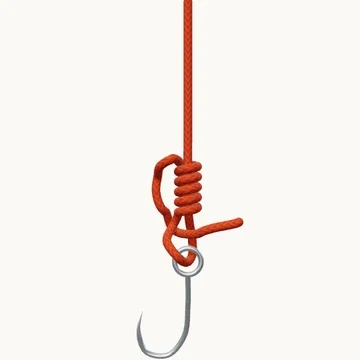
Attach line to a hook with coils around the standing part and one return through the eye-side opening.
Also known as Half blood knot.
The ordinary clinch is the starting structure of the improved clinch. After passing through the eye, wind the tag around the standing line and return it through the small opening beside the eye. This version ends there: it does not include the extra pass through the larger return loop.
That final-pass difference is easy to miss when following a picture. Compare the two lessons at the last tuck, then select the knot recommended for the line you are using. Keep the turns in a single tidy row while bringing them toward the eye.
When to use it
- Practice a basic hook-eye attachment in suitable monofilament.
- Compare the ordinary and improved clinch finishes.
Keep in mind
The ordinary clinch is not suitable for every line, especially slick braid. Seat and test the connection before trimming; follow the line maker’s guidance.
Check your knot
- The wraps surround the standing line.
- The tag returns through the small opening next to the eye.
- No extra large-loop tuck has been added.