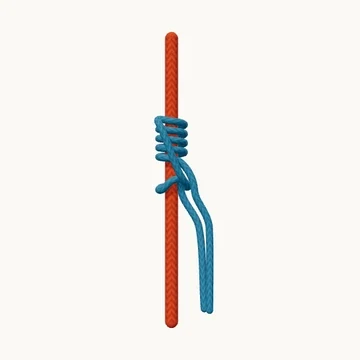
Make a four-over-one friction hitch with both cord ends below the wrap band.
The Distel hitch combines several upper turns with one lower hitch. The end descends across the outside of the upper band, wraps below it, and tucks under that diagonal. Both cord ends remain available below for the intended attachment.
This close-up shows a four-over-one arrangement. It omits the cord eyes and connector used in a working system so the lower tuck stays visible. Unlike a symmetrical Prusik, the upper band and the lower hitch have different roles and must face the intended load direction.
When to use it
- Study the four-over-one Distel structure.
- Compare directional friction hitches.
Keep in mind
Cord construction, diameter and system geometry determine grip and release. Arborist or climbing use requires a compatible complete system and qualified instruction.
Check your knot
- Four turns form the upper band.
- The lower turn traps the tail beneath the descending diagonal.
- Both cord ends emerge below the hitch.