FG Knot

FG Knot
Preparing the rope…

Cross the braid around the leader

1/8

Keep the leader straight and hold the two braid parts on opposite sides.

Fishing · 8 steps

Weave braid around a straight leader and lock the weave with alternating half hitches.

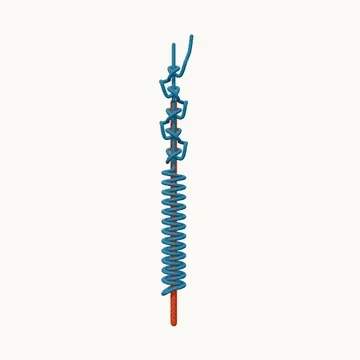
The FG joins thin braid to a thicker leader without folding the leader into a knot. Opposing braid parts cross around the straight leader in an alternating weave. Those crossings form the long gripping section; the half hitches at the end keep that section from unwinding.

This version shows twelve paired weaves, three locking half hitches around both lines, then two around the braid alone. In real line, tension and careful seating are essential. The enlarged view separates the crossings for inspection and leaves the leader end visible instead of animating a cut.

When to use it

  • Make a braid-to-leader fishing connection.
  • Study an alternating weave around a straight core.

Keep in mind

A loose weave can slide off a smooth leader. Practice tensioning and test the connection with the actual lines; do not substitute a few loose wraps for a seated FG.

Check your knot

  • Crossings alternate along the leader.
  • The braid grips before the finishing hitches are completed.
  • The final two hitches surround braid beyond the leader end.
How to tie FG Knot
  1. Cross the braid around the leader

    Keep the leader straight and hold the two braid parts on opposite sides.

  2. Begin the alternating weave

    Bring the braid around alternating sides of the leader.

  3. Build the first six pairs

    Keep the crossings even as the weave grows toward the braid ends.

  4. Complete twelve pairs

    Make twelve paired weaves, alternating the crossing on each side.

  5. Lock around both lines

    Tie alternating half hitches around the leader and the standing braid together.

  6. Add the third locking hitch

    Seat the weave before removing the projecting leader tag in real line.

  7. Finish around the braid

    Continue with two half hitches around the braid alone above the leader end.

  8. Seat the weave and locks

    Draw the braid crossings against the straight leader and snug the locking half hitches. Test the join before trimming.

Explore the 3D steps
References & further reading