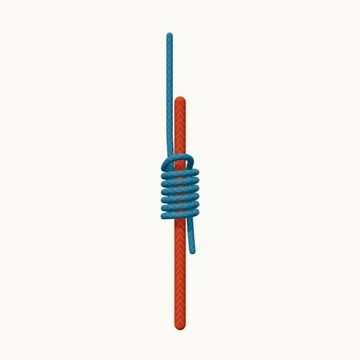
Bind a leader to a heavier line with close wraps and a tag returned beneath the coils.
Also known as Tube knot.
The nail knot makes a compact connection by wrapping the leader around the end of a heavier line. The tag then travels back beneath the whole row of turns. A nail, tube or dedicated tool normally preserves that passage while the wraps are made; it is removed before final seating.
Keep the tag’s return inside the coils, alongside the heavier line. Passing it around the outside may look similar from one angle but does not form the same binding. Work each turn into place as the knot is drawn down.
When to use it
- Connect a leader to a suitable fly line.
- Make a compact wrapped connection with a tying tool.
Keep in mind
The connection depends on the outer surface of the heavier line. Check compatibility with its coating and core; a nail knot is not appropriate for every line construction.
Check your knot
- The wraps surround the line being gripped.
- The returning tag passes under every coil.
- The turns remain adjacent as the guide is removed and the knot seats.