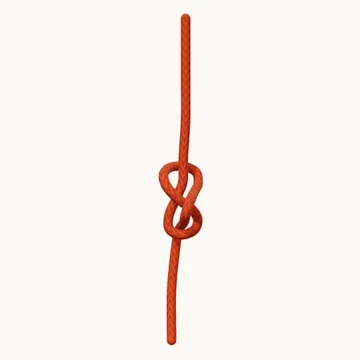
A simple stopper with an easy-to-recognize figure-eight shape.
Also known as Figure 8, Flemish knot.
The figure eight is an end stopper made by carrying the working end around the standing part before returning through the original loop. Its two lobes make the route easier to inspect than a compact overhand.
This lesson uses one strand. A figure eight tied in doubled rope makes a loop, while a second rope retracing it makes a bend. The familiar name covers several structures, so choose the lesson for the result you need rather than adding passes to this stopper at random.
When to use it
Keep a line end from running through a fitting.
Keep in mind
This is a stopper, not the doubled figure-eight loop.
Check your knot
- The end goes around the standing part before the tuck.
- Two lobes and a central crossing remain visible while loose.
- The tail extends beyond the dressed stopper.