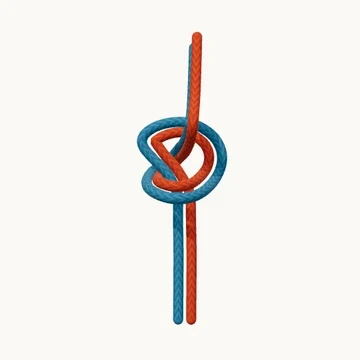
Join two rope ends with an overhand knot tied in both ends together.
Also known as Offset overhand bend.
For a flat overhand bend, lay two ends side by side and treat them as one while tying an overhand. Both free tails leave together, on the same side of the knot. This is different from a water knot, where one end retraces the other in the opposite direction.
The simple route can hide poor dressing. Work through the four separate parts, removing slack without letting one strand cross over its partner. Leave generous tails rather than trimming them close to the knot. This lesson shows the structure with two colors so the separate ropes remain easy to follow.
When to use it
- Learn a same-direction overhand bend.
- Compare a paired-end bend with a retraced bend.
Keep in mind
This bend can roll when poorly dressed or loaded in unsuitable conditions. Rappelling use requires specific training, suitable ropes and prescribed tail lengths; the model is not a complete procedure.
Check your knot
- Two independent ends travel through the opening together.
- Both tails emerge on the same side.
- Each of the four parts has been pulled individually.