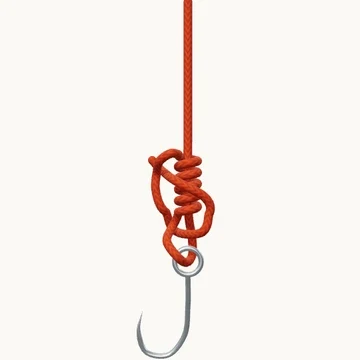
Improved Clinch

Improved Clinch
Preparing the rope…

Approach the eye

1/7

Bring the tag end toward the hook eye.

Fishing · 7 steps

Secure line to a hook with wraps and a final locking tuck.

Also known as Improved clinch knot.

The improved clinch starts with wraps around the standing line and a return through the small opening beside the hook eye. The tag then goes through the larger loop created by that return. This extra tuck is the improvement that distinguishes it from the ordinary clinch.

Keep the coils together as they move toward the eye. A neat row is easier to seat than crossed or overlapping turns. The number of wraps and the suitability of the knot depend on line diameter and material.

When to use it

Attach monofilament to a hook or swivel.

Keep in mind

Not a default choice for braid or heavy line; choose a knot suited to the line.

Check your knot

  • The first return uses the small eye-side opening.
  • The tag then passes through the larger return loop.
  • The coils seat together without riding over one another.
How to tie Improved Clinch
  1. Approach the eye

    Bring the tag end toward the hook eye.

  2. Pass through the eye

    Thread the tag end through the eye and turn it back toward the standing line.

  3. Start the wraps

    Wind the tag end around the standing line, moving away from the hook.

  4. Complete five turns

    Continue in the same direction. Keep the five turns separate.

  5. Pass the small loop

    Bring the tag end down and pass it through the small loop just above the eye.

  6. Pass the new loop

    Bring the tag end through the large loop created by the return. This extra tuck makes the improved clinch.

  7. Gather the wraps and tucks

    Draw the five turns together while retaining both return passages. Moisten suitable line before seating the knot against the eye.

Explore the 3D steps
References & further reading